


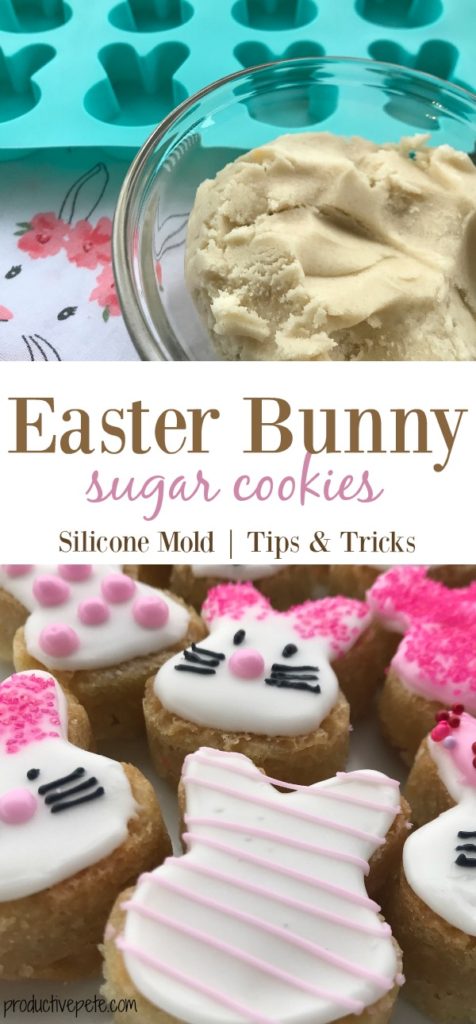
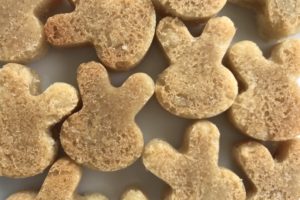
Easter will be here soon and I’m so excited to share with you these Easter Bunny Cookies! They are made using a bunny-shaped silicone mold and they are super adorable two-bite cookies.
These work great for Easter Party Treats or snacks to serve at your Easter Celebration.
This post contains affiliate links. This means if you click on something and purchase it, at no extra cost to you, I will earn a commission. Read more about this in our Disclosure Policy.
How to Make Easter Bunny Cookies
First, you need to purchase a bunny-shaped cookie mold. You can find them seasonally at Target, Wal-Mart (that’s where I found this one), or Craft Stores.
Amazon surprisingly doesn’t have many options for bunny molds. But they do have this set of Easter Eggs & Bunnies which could be fun to try next!
Also, you can use your favorite sugar cookie recipe, or prepared cookie dough will work just fine too.
How to Fill the Silicone Mold
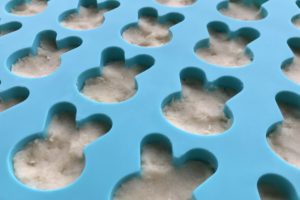
Simply press the cookie dough down into your mold using your finger or the tip of a spatula. The ears are the hardest area to squeeze the cookie dough into easily. It’s important to only fill the molds halfway to the top.
Do not fill the molds all the way up!
I will admit that I struggle with filling the molds up no more than halfway. They just look so empty and I keep adding a little bit more…
It never fails that my cookies bubble over the edges. If yours do too, have no fear, there is an easy solution to fix it.
Baking Your Easter Bunny Cookies
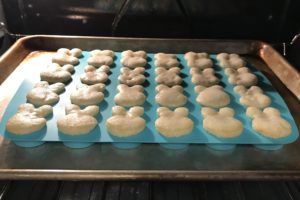
First, pre-heat your oven to 375°. Make sure you check your silicone mold’s temperature limit and adjust your baking temperature accordingly.
Then put your bunny-shaped mold on a cookie sheet and place it into the oven. These cookies will take around 15 minutes to cook.
At around 10 minutes, check on your bunny cookies. If you are like me, they will be bubbling up over the edges of the mold. It’s ok if they are bubbling over, don’t worry! There’s a fix to save your cookies!
So if your cookies have overflowed their molds, simply take them out and using a spatula, push them back into the mold.
Yes, they will now look funny and they will end up looking bumpy when you take them out of the oven later. That’s OK, because we are going to decorate the perfectly flat other side!
From my experience using cookie molds, the middle cookies are always a little softer and the edge cookies are going to bake faster.
It’s a balancing game getting the middle cookies done, without burning the edge cookies. So keep an eye on your cookies when you know they are close to being done.
Now walk away! Don’t mess with them! Just walk away!
In all seriousness, if you want to be able to get cookies out of an intricate-shaped cookie mold, you need to let them cool completely! Place your silicone mold on a cookie rack and patiently wait for it to be done!
Removing your Easter Bunny Cookies from Silicone Mold
Once your cookies have completely cooled, you will remove them from the mold.
Start by gingerly pushing up on only one end of the cookie. Pushing up from the bottom at the middle tends to break the cookies. The mold is flexible, so you will be able to pull it away from the cookie as you push the cookie out.
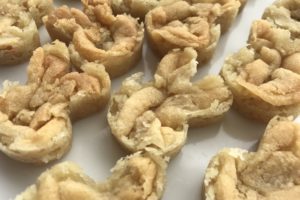
If your Bunny Cookies overflowed you are going to have very bumpy cookie tops like the photo below.
Don’t worry about it! If you are wanting to decorate your cookies, simply flip over the cookies and use the other side. You can push down slightly to even out the bumps and help the cookies lay flat.
Decorating Tips for Easter Bunny Cookies
Now, you get to decide how you want to decorate your cookies. I used a simple powdered sugar icing:
2 Cups powdered sugar
2 Tablespoons milk
1/2 Teaspoon vanilla extract
Food Coloring Liqua-Gel if desired
The vanilla extract is very important to this recipe! It makes the icing have a flavor much more enjoyable than just the powdered sugar.
Tip – if you want pure white icing, I would purchase Clear Vanilla Flavor Extract. If I’m using food coloring in the icing, I use regular vanilla extract.
The way I made these cookies is to pipe the edges with a thicker icing. I used a ziplock with a tiny piece of the edge cut off. Piping icing should have a thick consistency, like in the photo above. Its job is to create the border and stay where you place it.
Once you have piped your cookies, add a bit of milk (a little goes a long way) to your remaining icing to make the filler icing. If you used all your icing, simply make more using the recipe above, but add a little extra milk.
Squeeze the filler icing onto the cookies. I use a toothpick to spread the filler icing and blend it with the border.
Decorating Ideas for Easter Bunny Cookies

There are tons of simple decorating ideas for Easter Bunny Cookies. These are some ideas I want to try the next time I make them:
- Skip the Sprinkles and use various pastel icing colors for simple and classic cookies
- On the other end of the spectrum, use vibrant colors and crazy sprinkle choices
- Cover all the cookies in white icing and then do various colored polka dots & stripes
- Use a FoodWriter Pen to draw more detailed whiskers and faces on the cookies
No Comments